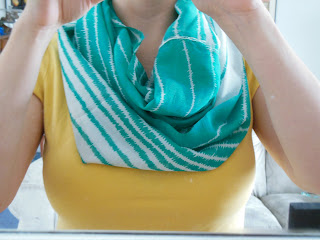
*Deep breath*
So today, my kitchen was a disaster and there were toys everywhere. You know, the usual. So what did I decide to do about it? Why, ignore it of course and make a scarf!
 | |||||||||||||||||||||||||||||||||
| Behold. |
I found this fabric on my last trip to Joann's. If you've never perused the remnant bin at a fabric store, then you need to start doing so. You never know what good stuff is going to pop up in there! Take, for example, this little find. I forget now what I paid for it, but the remnants were on clearance, so I think it ended up being a dollar give or take a few pennies for about 2/3 of a yard. Not too shabby. Then I sat around and stared at it for a while thinking, "What am I going to do with this?" Then it came to me: infinity scarf! I'm an accessories type of girl, but having a grabby baby makes it pretty much impossible to wear jewelry (or even glasses, yikes!). But Bubba can yank on this thing all he wants, and I don't feel so under dressed (like when I go to Wal-Mart. I hate being under dressed at Wal-Mart.)
First up, I laid the fabric out flat. Here it is in all it's glory:
 | ||
| I love the color and the stripes. Makes me think of the ocean. |
 |
Once that's dry, it's time to get pinning! Pretty easy (like everything I sew), just overlap the short ends about 1/2 inch and pin, pin, pin! (My mother taught me you can never pin too much. Go ahead, go nuts with it.) Then thread up that sewing machine and get to it! I used a zig-zag stitch to make the seam more secure and more attractive.
Once that's done, just pin the other two short ends together and sew just like you did before. If I really wanted to, I could have finished the raw edges and whatnot, but like I said, my sewing skills are very basic. Also, I didn't have much time to do this project. Bubba takes short naps. It's great. Also, I'm a little bit lazy. But raw edges are trendy, right?
 | |
| ...And the other side. Feels like we've been here before, huh? |
 | ||
| It's as tall as the fireplace, yay big scarves! |
I love how it turned out! And yes, I wore it to Wal-Mart. I felt pretty fancy.
Let me know what you think, or if you made one too!


No comments:
Post a Comment